This post is article-8 from the 30 Articles App series for SharePoint.
An App part is similar to webpart for your SharePoint App.
How to create it?
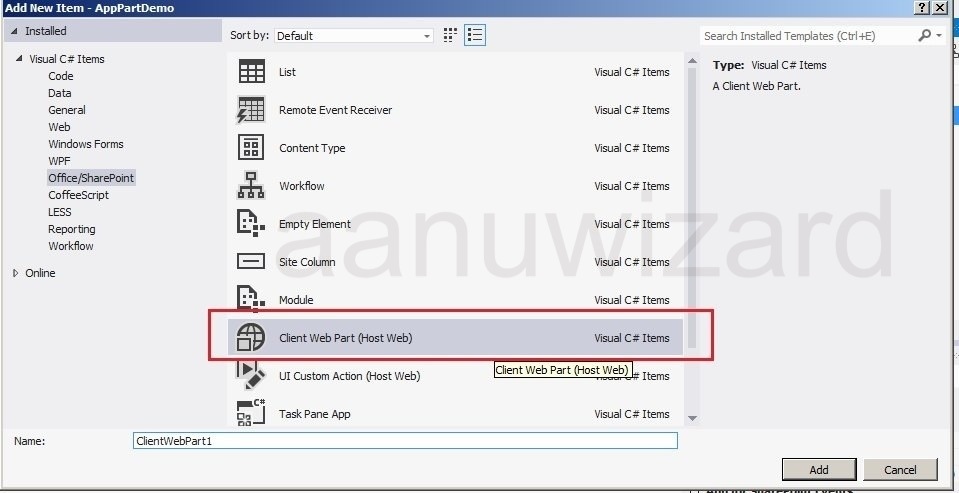
- Open your Sharepoint App project in Visual Studio.
Add new Item-> Client webpart-> Add it . - Add your clientwebpart page HTML/ASPX
here I have created ClientWebpartPage.ASPX.
Make sure that you have put allowframing into your page.
<WebPartPages:AllowFraming ID=”AllowFraming1″ runat=”server” /> - Open the element.xml file you have created from step -(1)
and give the reference to the file you have added into step -(2) as below
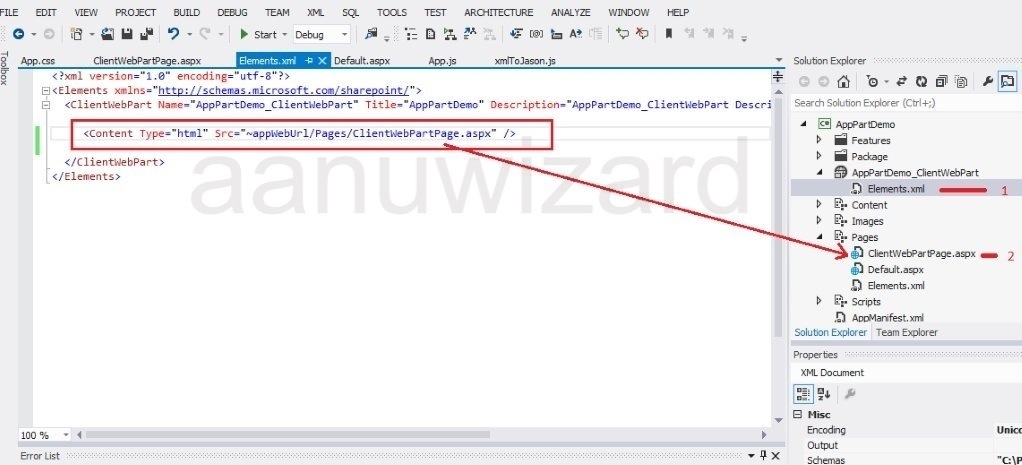
<?xml version=”1.0″ encoding=”utf-8″?>
<Elements xmlns=”http://schemas.microsoft.com/sharepoint/”><ClientWebPart Name=”AppPartDemo_ClientWebPart” Title=”AppPartDemo” Description=”AppPartDemo_ClientWebPart Description” DefaultWidth=”250″ DefaultHeight=”300″>
<Content Type=”html” Src=”~appWebUrl/Pages/ClientWebPartPage.aspx” />
</ClientWebPart>
</Elements>
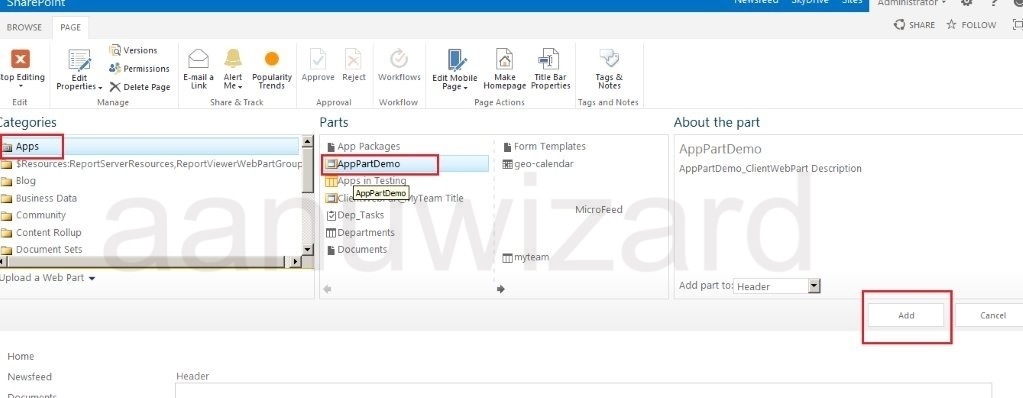
How to Add it to SharePoint Page?
Simple just like you add a webpart.
Edit page-> insert webpart -> Apps -> choose your app part and save the page.
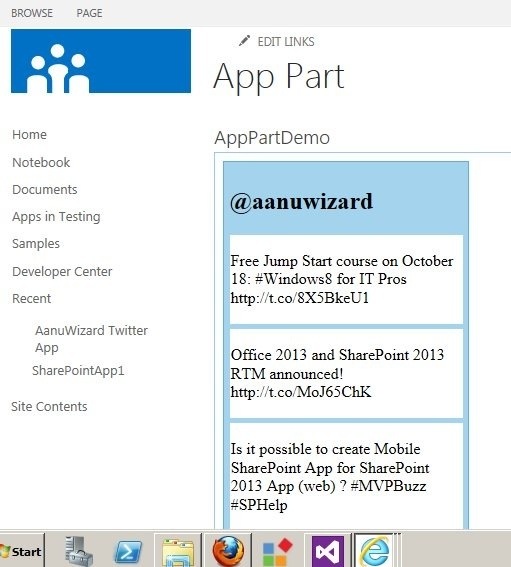
Here is how it looks after Adding my twitter App Part to SP Host.